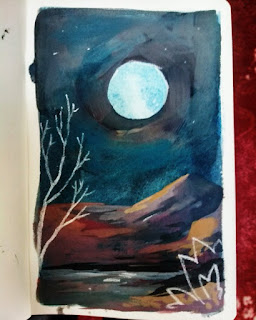
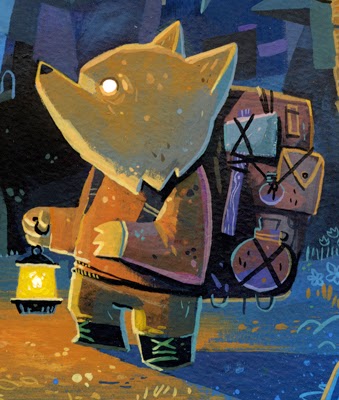
My painting for the 2016 ANIMATION ART SHOW
News
Hello.
I haven’t uploaded anything for ages, and I get the feeling I won’t be uploading much for a while. I’m really busy at the minute working as co-art director with Reza Riahi on the Cartoon Saloons next feature, an adaptation of Deborah Ellis’ “The Breadwinner”.
On top of that, I haven’t really done anything in my spare time worth posting. I occasionally post doodles on my twitter (hellociaran) but I pretty much spend my evenings farting about with wood or writing my own stuff so I have nothing to upload.
This painting is irrelevant, by the way. I just didn’t want to post a bunch of words.
ACES
Louise is pitching a tv series at Cartoon Forum this year, so I made a thing for her. Her programme is called Ellie the Ace (row 4) and I also worked on a trailer she made for the pitch that I think you'll be able to see soon enough.
With all the waiting for glue and oil to cure, it actually took a few weeks because I had to keep its manufacture secret for the whole time. Here's some progress photos:
I had some rosewood from a bit of guitar-based shenanigans
but they were kind of warped and misshapen, so I boiled them, pressed them flat and then cut them into four rectangles. It was during the boiling that I found out why it's called rosewood. The smell was amazing.
After glueing the rectangles together, I cut a circle out of it.
Then I routed out a circle from a piece of, I think, mahogany..
..and glued in the rosewood disc. I routed the circle too shallow so that the rosewood could be chiselled and sanded down to the right level leaving a perfectly uniform surface.
Bongo.
Prop time. I drew a dickie bow on a couple of glued-together bits of maple
Then I cut it into a propeller shape (It was hard enough. I didn't need the extra challenge of taking progress photos) and sanded and sanded and sanded.
At one point, I made a wee nose cone out of leftover rosewood laminations, but the size was wrong. It looked a bit ridiculous and then, when I started cutting the holes in it, it exploded. Better off without it anyway, but it looks pretty cute here.
Then I glued the prop to the disc and gave it a couple of coats of tung oil.
The end.
Blue Space
Here's a reminder that I have an account with INPRNT, amazing purveyors of top-quality prints.
My shop is here.
Song of the sea shell
I've recently starting messing around with wood. The first thing I made was this ring.
Step 3, carved it.
Actually, the first thing I made was a bass ramp. I can't be bothered
explaining that but it's basically a small, thin block with a lot of right
angles. Making right angles happen by hand was really hard, so I swore
off it.
I made the ring by putting together a makeshift lathe using a drill
and some gubbins. It mostly worked, but still needed lots of
hand-carving.
For my next project, I thought it
would good to make something for the Cartoon Saloon to celebrate
finishing "Song of the sea" (facebook page), and to say thanks for the job. It was a
really good project to work on and you just can't take that for granted in
animation.
So, if you've seen the teaser trailer, you'll have seen
this seashell that the two children have. That seemed easy to make. In fact, it seemed so
easy, I wondered if I'd even carve those spiral shapes into it.
...fat chance.
I very quickly realised that I need to take smaller steps with this whole wood adventure. Here's how it came together.
I had a lovely bit of wood that I'd been drying for a year or so.
Spalted wood is one of my favourite things in the world, and I've read people saying
how hard it is to work. When I started, I didn't see what they were
talking about. It's so spongey and soft! So easy to cut. ...but then it
starts crumbling and denting really easily, and it's really unstable and
hard to predict. Because it's so spongey and soft.
Anyway,
Step 1. No photo. I cut a block out of the lump of wood,
slightly bigger than the dimensions I wanted for the final piece; about
10cm square and 4cm thick.
Step 2, drew the shape on and sawed it roughly to shape, then closer with a chisel and this Mora knife.
Step 3, carved it.
Step 4, made a little foot.
I also cut a small hole into the base and the shell so I could add a dowel, whittled from an old paintbrush, to strengthen the joint.
Step 5, sanding sanding sanidng sandngi sdngng asngnd snigdns gsgsnsg
Step 6, three coats of pure tung oil and some thin CA to stabilise the spongiest bit of the wood.
Then I glued that sucker up.
And that's it. It's a bit wonky but I'm pretending that was intentional, to capture the hand-drawn nature of the film.
...even
though this is more like a blind, wrong-handed drawing of a shell.
Still, it was fun and I learned a lot doing it so it's on to my next bit of woodery.
Still, it was fun and I learned a lot doing it so it's on to my next bit of woodery.
I also discovered I enjoy making little wonky boxes.
Subscribe to:
Posts (Atom)


.jpg)
.jpg)
.jpg)
.jpg)
.jpg)
.jpg)
.jpg)
.jpg)
.jpg)
.jpg)
.jpg)
.jpg)
.jpg)
.jpg)
